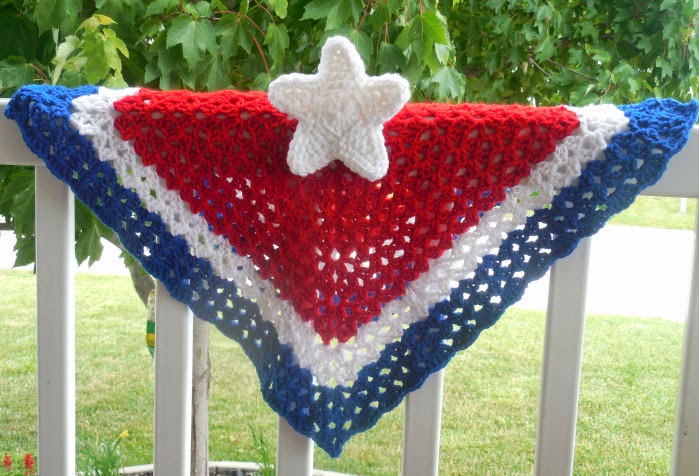
There's still time to stitch these up in time for the weekend!
I used Red Heart yarn and size I (5.50mm) hook and got a finished size of 13" x 19". I like my placemats a bit bigger, if you want them a bit smaller, maybe try the next hook size down. You will want to use a lighter weight yarn or crochet thread with the appropriate size hook for the stars so they will all fit. Alternatively, you could use a worsted weight yarn and make one large star in place of the 5 small ones using the pattern from my
4th of July Star Lovey.
Pattern:
(with red) ch 62
Row 1: sc in 2nd ch from hook, *hdc in next ch, sc in next ch, repeat from * to end of row, turn
Row 2: ch 2 (counts as first hdc), *sc in next hdc, hdc in next sc repeat from * to end of row, turn
Row 3: ch 1, *sc in next hdc, hdc in next sc, repeat from * to end of row, turn
Switch to white
Row 4: repeat row 2
Row 5: repeat row 3
Row 6: repeat row 2
Switch to Red
Row 7: repeat row 3
Row 8: repeat row 2
Row 9: repeat row 3
Switch to white
Row 10: repeat row 2
Row 11: repeat row 3
Row 12: repeat row 2
Switch to Red
Row 13: repeat row 3
Row 14: repeat row 2
Row 15: repeat row 3
Switch to white
Row 16: repeat row 2
Row 17: repeat row 3
Row 18: repeat row 2
Switch to Red
Row 19: repeat row 3, working the first 40 stitches with red, then switch to blue and work the last 21 stitches
Row 20: repeat row 2, working the first 21 stitches with blue, then switch to red and work the last 40 stitches
Row 21: repeat row 3, working the first 40 stitches with red, then switch to blue and work the last 21 stitches
Row 22: repeat row 2, working the first 21 stitches with blue, then switch to white and work the last 40 stitches
Row 23: repeat row 3, working the first 40 stitches with white, then switch to blue and work the last 21 stitches
Row 24: repeat row 2, working the first 21 stitches with blue, then switch to white and work the last 40 stitches
Switch to Red
Row 25: repeat row 3, working the first 40 stitches with red, then switch to blue and work the last 21 stitches
Row 26: repeat row 2, working the first 21 stitches with blue, then switch to red and work the last 40 stitches
Row 27: repeat row 3, working the first 40 stitches with red, then switch to blue and work the last 21 stitches
Row 28: repeat row 2, working the first 21 stitches with blue, then switch to white and work the last 40 stitches
Row 29: repeat row 3, working the first 40 stitches with white, then switch to blue and work the last 21 stitches
Row 30: repeat row 2, working the first 21 stitches with blue, then switch to white and work the last 40 stitches
Switch to Red
Row 31: repeat row 3, working the first 40 stitches with red, then switch to blue and work the last 21 stitches
Row 32: repeat row 2, working the first 21 stitches with blue, then switch to red and work the last 40 stitches
Row 33: repeat row 3, working the first 40 stitches with red, then switch to blue and work the last 21 stitches
Row 34: repeat row 2, working the first 21 stitches with blue, then switch to white and work the last 40 stitches
Row 35: repeat row 3, working the first 40 stitches with white, then switch to blue and work the last 21 stitches
Row 36: repeat row 2, working the first 21 stitches with blue, then switch to white and work the last 40 stitches
Switch to Red
Row 37: repeat row 3, working the first 40 stitches with red, then switch to blue and work the last 21 stitches
Row 38: repeat row 2, working the first 21 stitches with blue, then switch to red and work the last 40 stitches
Row 39: repeat row 3, working the first 40 stitches with red, then switch to blue and work the last 21 stitches
You can finish off and weave in ends after row 39 if you like, or work a border of sc in blue evenly around all 4 sides as shown in the 1st photo.
Star Pattern:
with white, make 5
start with MR
Rnd 1: ch3, 14 dc into ring, sl st to top of beg ch2 to join, pull yarn tail to close ring
Rnd 2: *ch6, sc in 3rd ch from hook, hdc in next ch, dc in next ch, tr in last ch, sk next 2 dc on rnd 1, sl st in next dc (star point made)
Repeat from * for remaining 4 star points, sl st to the bottom of the 1st ch6 to join
finish off, leaving a length of yarn to sew star to placemat
Thanks for reading, I hope you will enjoy this pattern. If you have any questions, comments, or find any errors in the pattern please let me know by leaving a comment below.
Have a happy and safe 4th weekend!
Julie